Skip to content
Smart One IPTV has revolutionized the way we consume television content, offering a wide variety of channels and on-demand options for users worldwide. As the digital age progresses, more people are turning to IPTV (Internet Protocol Television) as a cost-effective alternative to traditional cable. In this comprehensive guide, we will walk you through the setup process for Smart One IPTV and explain how you can get the most out of this popular streaming app.
If you’re new to IPTV services, you may also want to explore the best IPTV subscription providers to find the right service for you.
Why Choose Smart One IPTV?
Before diving into the setup process, let’s take a moment to consider why Smart One IPTV is so popular among users. This service stands out for several key reasons:
- Wide Selection of Channels: Smart One IPTV provides access to thousands of live TV channels from across the globe, covering everything from sports to entertainment and news.
- User-Friendly Interface: The app is designed with simplicity in mind, making it easy for users of all technical levels to navigate.
- Seamless Streaming: With high-quality streams, you can enjoy buffer-free and HD-quality TV, no matter where you are.
- Customizable Playlist: Upload your M3U playlists to tailor your viewing experience to your specific preferences.
However, to enjoy these features, you’ll first need to set up Smart One IPTV on your Smart TV. Let’s explore the setup process in detail.
Step 1: Install the Smart One IPTV App
The first step in setting up Smart One IPTV is to install the app on your Smart TV. This process varies slightly depending on the TV brand (Samsung, LG, Android TV, etc.), but it typically involves the following:
- Search for the Smart One IPTV App: Go to your device’s app store and search for “Smart One IPTV.”
- Install the App: Select the app and hit “Install.”
If you’re using an Android-based TV, this process is quick and simple. For other TVs, make sure your device is connected to the internet.
Once installed, open the app to proceed to the next step.
Step 2: Take Note of Your MAC Address
After installation, Smart One IPTV will display a unique MAC address. This address is essential for registering your IPTV service. You’ll need this address to upload your IPTV playlists. Here’s how you proceed:
- Note the MAC Address: It will be visible on the screen after installation. Write it down or take a picture for future reference.
This step is crucial for ensuring that your device can be authenticated by the IPTV service.
Step 3: Upload Your M3U Playlist
To start enjoying your IPTV content, you will need an M3U playlist. An M3U playlist contains the links to the TV channels you want to watch. You can create your own playlist or obtain one from a trusted IPTV service provider.
If you’re looking for a reliable IPTV subscription, consider checking out IPTV UK’s subscription plans, which offer a broad range of channels.
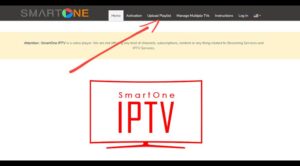
Uploading Your Playlist
- Visit the Smart One IPTV Site: Using your browser, navigate to the Smart One IPTV website.
- Find the “Upload Playlist” Option: This option is usually at the top of the page.
- Enter Your MAC Address: Type in the MAC address you noted earlier.
- Name Your Playlist: You can choose any name for your playlist (e.g., “My Favorite Channels”).
- Add Your M3U Playlist URL: Copy and paste the M3U URL provided by your IPTV service provider into the relevant field.
Once the playlist is uploaded, you’re ready to enjoy endless hours of entertainment.
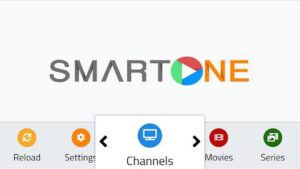
Step 4: Enjoy Your Channels
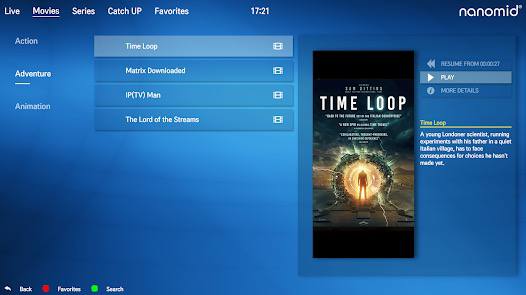
After uploading the M3U playlist, you can now open the Smart One IPTV app and start streaming. The app will load your selected channels, allowing you to browse through a variety of categories, including:
- Sports Channels
- Movies
- News
- Music
The process is simple: just choose a category, select a channel, and enjoy live streaming. With Smart One IPTV, you can easily create a tailored TV experience based on your preferences.
Click here to visit their Site : https://smartone-iptv.com/
For users new to IPTV, IPTV UK offers a variety of packages that allow you to try the service before committing to a long-term plan. This trial can help you get a feel for the service and see if it’s right for your needs.

Troubleshooting and Support
If you encounter any issues while setting up Smart One IPTV, don’t worry—help is available. The following troubleshooting tips should help resolve common problems:
- Verify Your MAC Address: Double-check that you entered the correct MAC address.
- Check Your IPTV Subscription: Make sure your IPTV service is active and that your M3U playlist is correctly configured.
- Contact Support: If you continue to experience issues, you can reach out to Smart One IPTV’s customer support or your IPTV service provider for assistance.
Additionally, you can explore the refund and returns policy to ensure that you’re satisfied with your IPTV service.
Enhance Your Streaming Experience
To take your IPTV experience to the next level, consider using a VPN for added security and privacy while streaming. A VPN can help you access geo-restricted content and keep your internet activities safe. Also, regularly check for updates to your IPTV service to ensure optimal performance.
If you’re looking for more ways to improve your viewing, IPTV UK’s website offers a range of resources and subscription options to help you get the most out of your IPTV setup.
Conclusion
Smart One IPTV is an excellent solution for those looking to cut the cord and enjoy streaming high-quality TV content without the hassle of traditional cable. By following these simple setup steps, you’ll be able to access thousands of channels, sports, movies, and much more. With the right IPTV subscription and a personalized playlist, you can create an exceptional TV experience tailored to your preferences.
For the best IPTV services in the UK, consider visiting IPTV UK to explore subscription options that suit your needs.